12 Sep Student Video Project – Timelapse of Fall
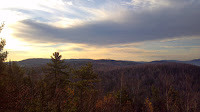
The fall is my favorite season of the year. I love waking up to cold, crisp mornings then enjoying mild days outside. In fact, that’s what I’m planning to do tomorrow morning. This time of year always reminds me of one of my favorite uses for time-lapse video creation tools. The outline of my time-lapse of autumn project is included below.
The idea is to take one picture every day to document the changes in the foliage as we progress through autumn from the first few orange leaves to full-blown autumn foliage colors to the drab brown we see after in the winter.
Here’s how your students could create their own autumn foliage timelapse videos.
1. Take one picture per day of the same view or of one singular tree.
Using a cell phone is probably the best tool for this because students rarely go anywhere without one.
2. Upload the pictures to a Google Drive folder.
It only takes one tap to move photos from a phone to a Google Drive folder labeled “Fall foliage.” If This Then That has a recipe for doing this automatically from Android phones and from iPhones. Or simply use Google Photos and then move the photos into a folder at the end of the month.
3. After four weeks, upload photos to Cloud Stopmotion or Stop Motion Animator and create your timelapse.
Cloud Stopmotion is a video editing program that works in your web browser. You can easily adjust the duration of each frame and easily add a soundtrack to your video. Click here for a video about using Cloud Stopmotion. Stop Motion Animator is another free tool for creating stop motion movies. Here’s a demo of how it works.
The fall is my favorite season of the year. I love waking up to cold, crisp mornings then enjoying mild days outside. In fact, that’s what I’m planning to do tomorrow morning. This time of year always reminds me of one of my favorite uses for time-lapse video creation tools. The outline of my time-lapse of autumn project is included below.The idea is to take one picture every day to document the changes in the foliage as we progress through autumn from the first few orange leaves to full-blown autumn foliage colors to the drab brown we see after in the winter.Here’s how your students could create their own autumn foliage timelapse videos.1. Take one picture per day of the same view or of one singular tree. Using a cell phone is probably the best tool for this because students rarely go anywhere without one.2. Upload the pictures to a Google Drive folder. It only takes one tap to move photos from a phone to a Google Drive folder labeled “Fall foliage.” If This Then That has a recipe for doing this automatically from Android phones and from iPhones. Or simply use Google Photos and then move the photos into a folder at the end of the month. 3. After four weeks, upload photos to Cloud Stopmotion or Stop Motion Animator and create your timelapse. Cloud Stopmotion is a video editing program that works in your web browser. You can easily adjust the duration of each frame and easily add a soundtrack to your video. Click here for a video about using Cloud Stopmotion. Stop Motion Animator is another free tool for creating stop motion movies. Here’s a demo of how it works.  Free Technology For Teachers, how to, stop motion, stopmotion, time lapse, timelapse, Video Editing, video projectsRead More


Sorry, the comment form is closed at this time.